
How to connect Odoo to Voxbi: a step-by-step setup guide
Gather four Odoo credentials, set the integration up in the Voxbi Cockpit, and verify call logging. A complete walkthrough for Odoo 16 to 19.
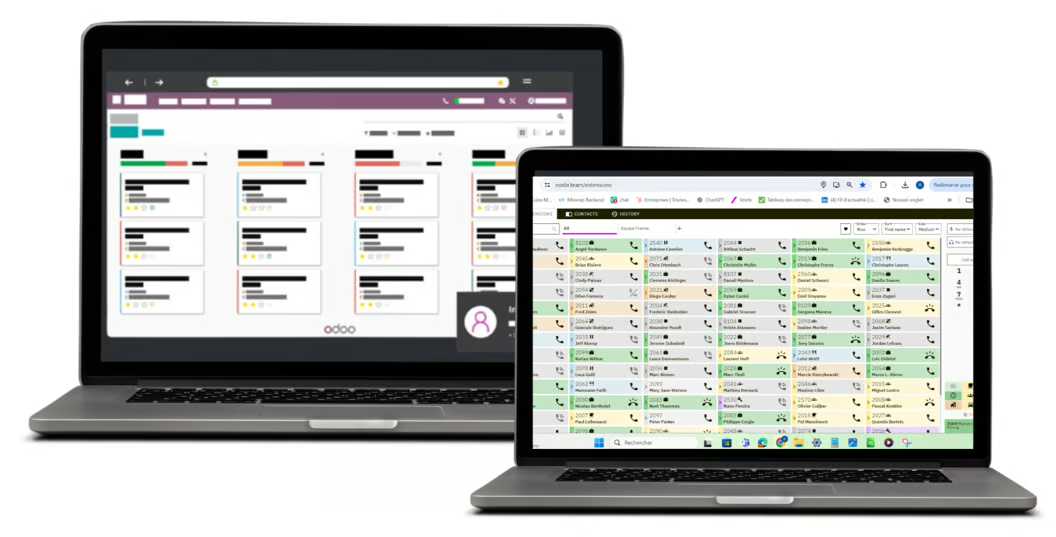
This guide walks you through connecting your Odoo instance to Voxbi so every call logs itself on the right contact. If you want the bigger picture first (what the integration does, click-to-call, transcripts, and screen-pop), read the Odoo VoIP integration overview. When you are ready to set it up, follow the steps below.
The process has two phases. Phase 1 is preparation: you gather four pieces of information from Odoo. Phase 2 is installation: you enter those four values in the Voxbi Cockpit and let it do the rest.
Supported Odoo versions: 16, 17, 18, and 19, on Odoo Online, Odoo.sh, and self-hosted deployments. Make sure your version is one of these before you begin.
Phase 1: gather your Odoo credentials
Before you open the Cockpit, collect these four things from your Odoo instance.
1. Odoo URL (the instance address)
The full web address you use to reach your Odoo instance.
| Odoo type | How to find it | Example |
|---|---|---|
| Odoo Online (Cloud) | The URL in your browser's address bar after you log in. | https://mycompany.odoo.com |
| Odoo self-hosted | The address configured by your system administrator. | https://odoo.my-domain.com or http://localhost:8069 |
2. Odoo database name
The database name makes sure the integration connects to the correct data source.
| Odoo type | How to find it | Example |
|---|---|---|
| Odoo Online (Cloud) | The subdomain of your URL (for example, mycompany from https://mycompany.odoo.com). You can also check your database overview at https://www.odoo.com/my/databases. |
mycompany |
| Odoo self-hosted | Ask your system administrator, or check the server configuration file (for example, /etc/odoo/odoo.conf) for the db_name parameter. |
prod_db_2024 |
3. Odoo username or email
Use the email or username of an Odoo user with administrator rights. We recommend creating a dedicated integration user with full administrative access, for cleaner security and logging.
4. Odoo API key (the security token)
The API key is the secure password the Cockpit uses to connect. It is shown only once, so copy it straight away and store it somewhere safe.
To generate the API key:
- Log in to Odoo with the administrator account you will use for the integration.
- Click your profile picture (top right) and choose My Profile or Preferences.
- Open the Account Security or API Keys section.
- Click New API Key.
- Give the key a clear name, for example
Voxbi integration. - Confirm with your Odoo password if prompted.
- Copy the generated key from the screen.
Phase 2: set up the integration in the Voxbi Cockpit
With the four credentials in hand, set up the integration in the Voxbi Cockpit.
Step 1: open the Cockpit and choose Odoo
- Go to
cockpit.voxbi.com. - Log in with your administrator credentials.
- Open Integrations and select + New integration.
- Choose Odoo from the list of available integrations.
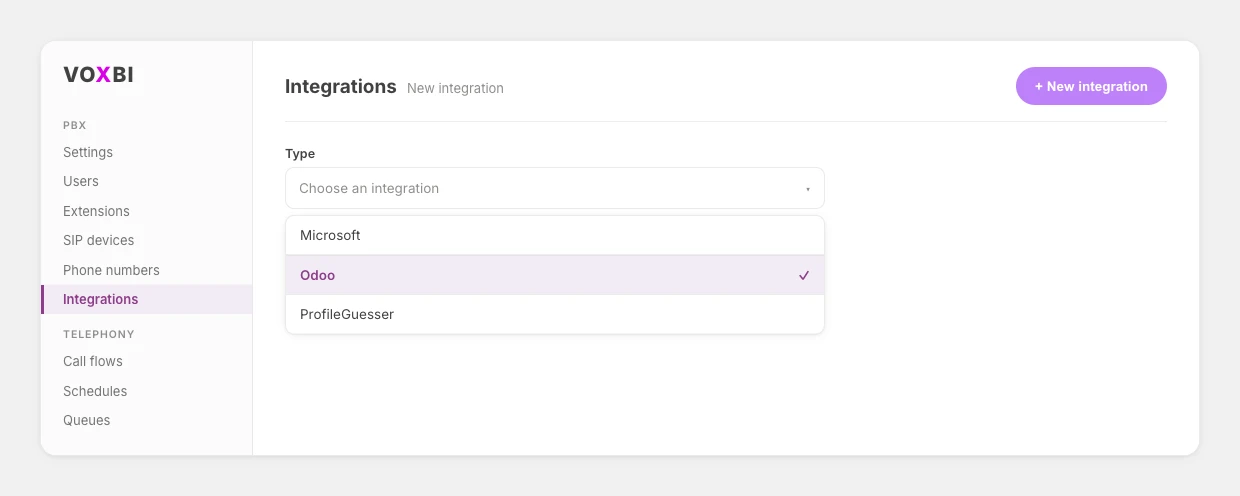
Step 2: complete the configuration form
Fill in the form using the credentials you gathered in Phase 1.
| Field | Value to use | Notes |
|---|---|---|
| Odoo URL | The full address of your Odoo instance. | For example, https://mycompany.odoo.com |
| Database name | The name of your Odoo database. | For example, mycompany |
| API key | The secure key you generated. | This is not your Odoo password. |
| Username or email | The Odoo administrator email or username. | Make sure this user has full admin rights. |
Then set the Active toggle to on and save the integration.
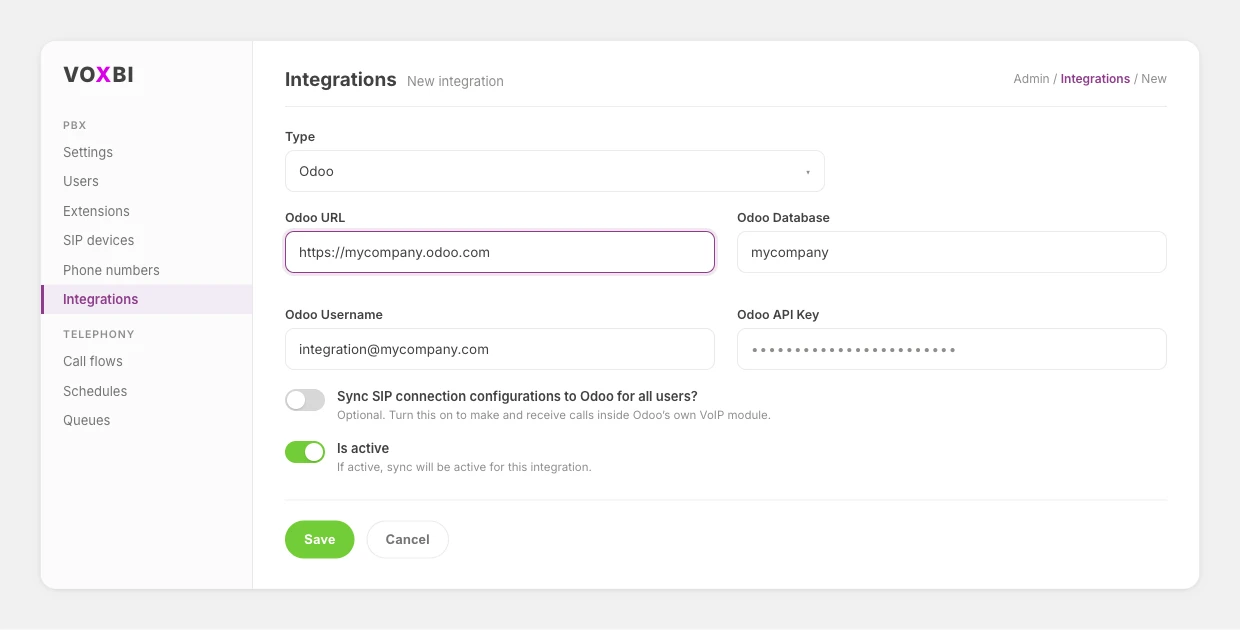
Step 3: watch the automatic installation
When you save, Voxbi begins the installation automatically. It:
- Connects to your Odoo instance.
- Installs the Voxbi module inside Odoo.
- Configures the module for call synchronization.
While it runs, watch the live log panel (the black box on the page) for real-time updates. The integration status changes to Connected once the connection is established, and the log ends with a success message when the module has installed and configured correctly.
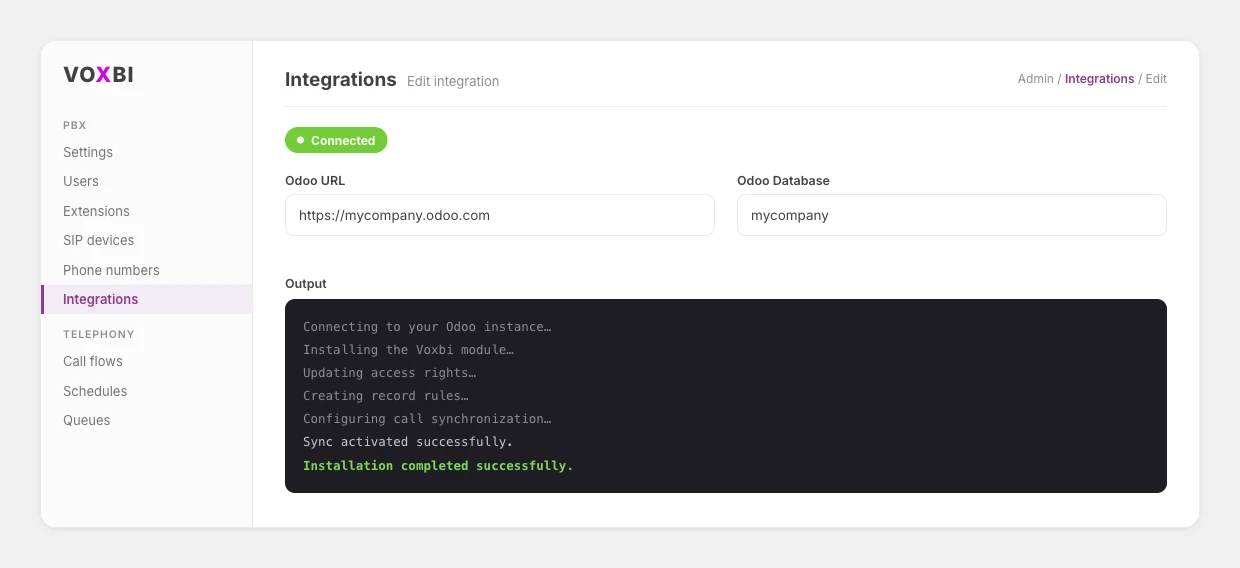
Step 4: verify the module in Odoo
- Log in to your Odoo instance.
- Go to Apps.
- Confirm the Voxbi module is present and installed.
Once the module appears, its features (call logging and contact synchronization) switch on automatically, and calls start syncing shortly. The first full sync completes within about an hour. Users are matched between Voxbi and Odoo by email address, so if someone's calls are not syncing, check that their email is the same in both systems.
Step 5 (optional): make and receive calls inside Odoo
If you want your team to make and receive calls directly from Odoo's own VoIP module:
- Return to the Odoo integration settings in the Voxbi Cockpit.
- Enable Sync SIP connection configurations to Odoo for all users.
- Save the changes.
This syncs the SIP settings for every user, so calls work inside Odoo without any per-person setup.
Need help?
If you get stuck or see an error during setup, email us at hello@voxbi.com. Include a screenshot of the Cockpit log panel and any Odoo error messages so we can help you faster. For more on what the integration does day to day, see the Odoo VoIP integration overview. Running Odoo Community Edition? The Voxbi for Odoo Community page covers the details.